I hope everyone had a wonderful Memorial Day weekend! I hope you guys were able to spend some quality time with family and friends (we had a big party at our swim and tennis club) while still remembering the reason we are able to enjoy this extra day off work. Thank you and god bless to those who made the ultimate sacrifice for our country!
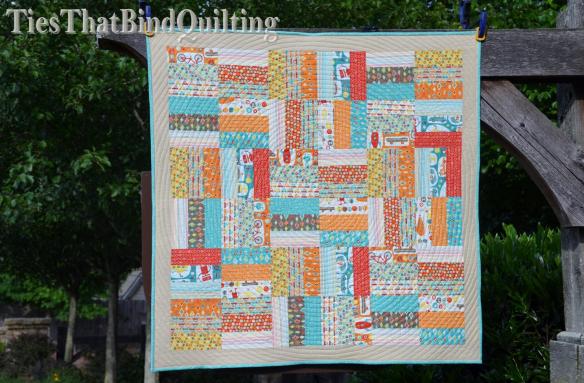
Earlier this weekend, I finished quilting and binding my Jelly Roll Jam baby quilt. And it is a good thing too because the little guy I was making it for made his appearance earlier today!
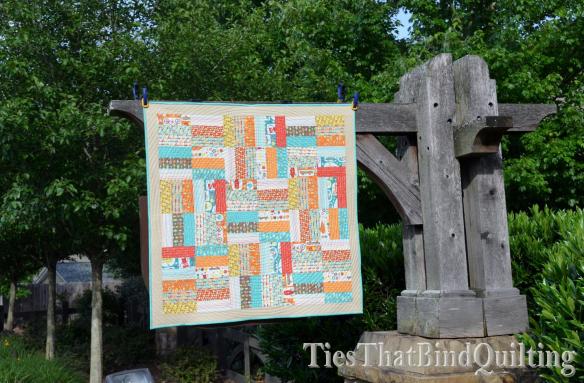
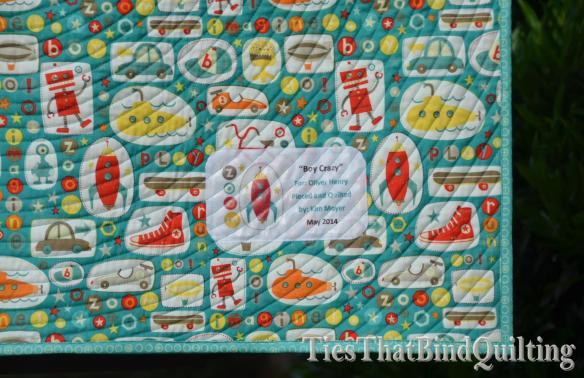
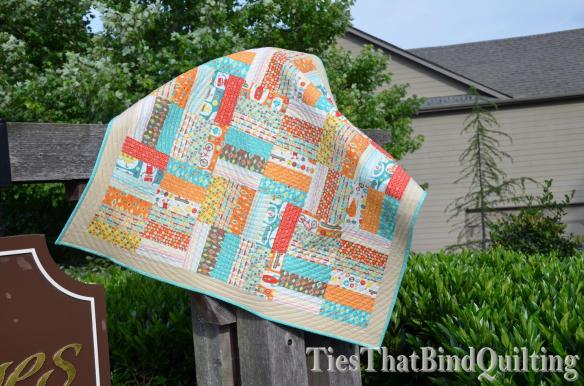
“Boy Crazy”
Quilt Stats:
Size: 40″ x 40″
Pattern: Jelly Roll Jam by Fat Quarter Shop
Type of Quilting: Spiral on my home machine
Fabric Line(s) Used: Boy Crazy by Riley Blake
Date Finished: May 2014
This was my first time attempting to do spiral quilting. I did everything on my home machine and was pleasantly surprised with how well it went! And I LOVE the effect this quilting leaves! So don’t be intimidated by the spiral – they are definitely worth the effort and aren’t nearly as complicated as I anticipated!
A big thank you to those of you who weighed in on the border/no border debate. As you can see, I decided to go with a border but I did stray from the gray/white I was thinking and went with Kona Khaki! The warmer tones in the khaki looked so much better alongside the quilt top compared to the cooler grays and whites.

I tried something new with this quilt that I always hear mixed reviews about in the quilting world. When I was sewing down my binding (I finished it by machine), I used a different color thread in my bobbin than on my spool!
I knew I wanted to use the same teal thread from my quilting on my spool so that it would blend into the binding fabric, but the bobbin thread was going to be making a straight line down the edge of my khaki border and I felt the teal would stand out too much (especially with the spiral quilting). So I used a tan thread in my bobbin to blend with the Kona khaki and I’m happy to report that I didn’t have any issues with the different colors poking through onto the opposite side. I guess I must have my tension set really well!
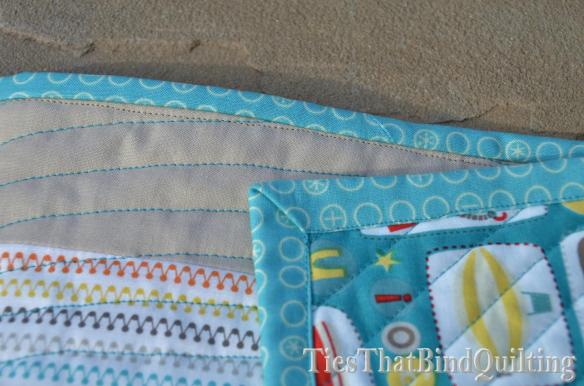
I also love how this label turns out and I think it is my favorite I have made so far. As you can see from this picture, the teal thread I used for quilting blended almost perfectly into the quilt back!
Now let’s get real for a second here. I know the blogging world likes to present these “perfect” finished projects when we share our creations (heck – I’m guilty of this too!) but sometimes I think it is nice to see that our quilts don’t have to be “perfect” for them to look great.
While it is true what I said above that spiral quilting wasn’t nearly as hard as I expected, my spiral still isn’t perfect.

See those wonky lines and little points coming off of what is supposed to be a smooth continuous curve? If you looked really closely, there are plenty of little mistakes like this throughout my quilting. But they don’t change to overall effect of the spiral (you’d NEVER notice them when taking in the quilt as a whole) nor do they hurt the actual construction and durability of the quilt.
In my opinion, it is these little imperfections that really show that something is handmade. Nothing we make by hand is ever going to be “perfect” (ie mistake free), but it is the time and effort and love that we put into a creation that really makes it perfect.
I hope no one ever feels like their work isn’t “good enough” because it doesn’t seem as “perfect” as the final projects presented by others. Embrace the imperfections because they are what make each of our projects special!

Overall, I am really happy with the quilt and it is a great pattern for something you want to come together quickly but still have a lot of visual interest.
I can’t wait to meet my friend’s new little bundle of joy and to give him his present!


 “Grandma’s First Quilt”


